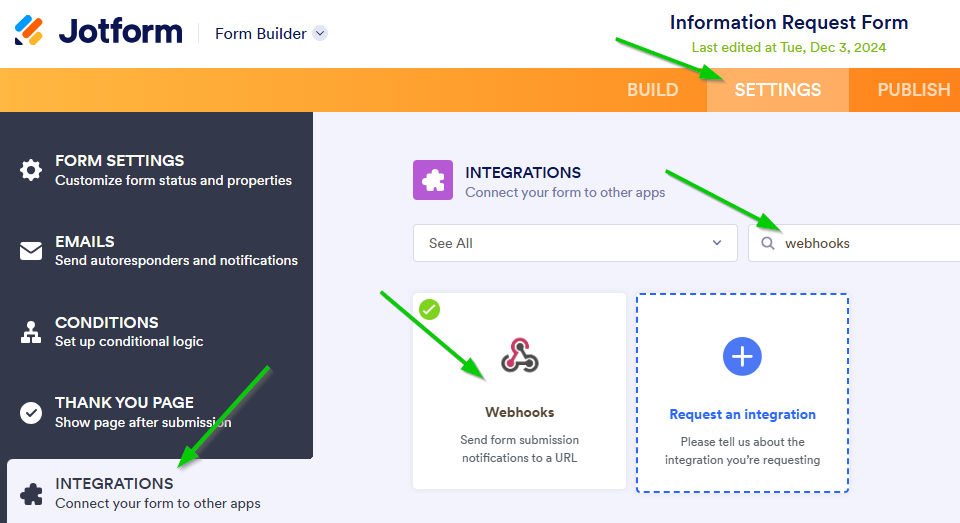
You can also use an external form service like JotForm or Google Forms to design custom forms and link them to Atom. You do this by setting up a webhook in your form that sends the data to Atom.
Step 1 – Set up the webhook
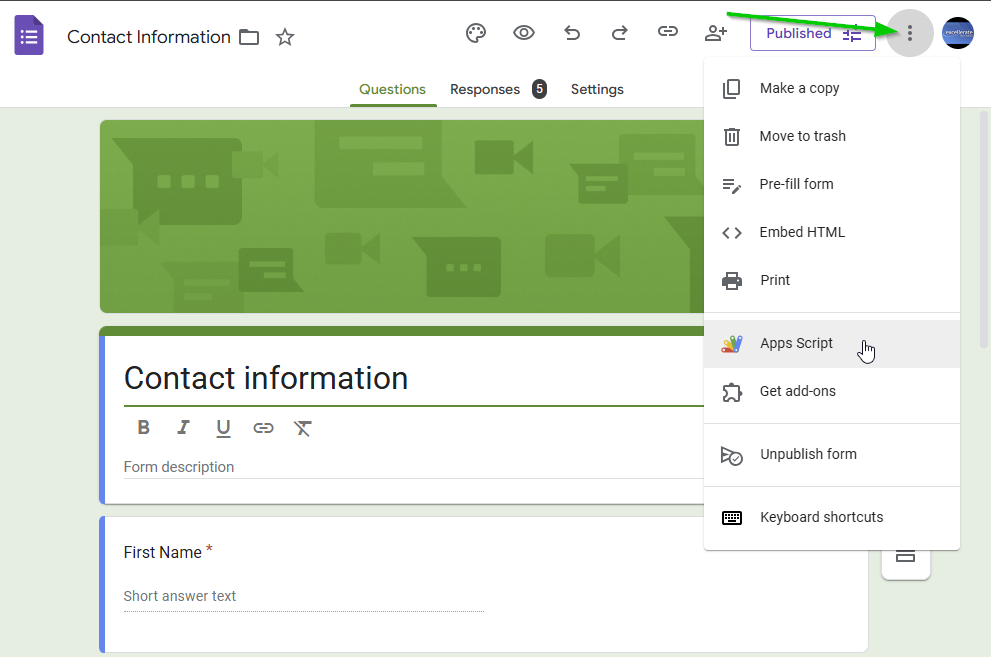
In Google forms, edit your form, click the More icon at the top, then App scripts
Click on the code editor, and paste in the following code:
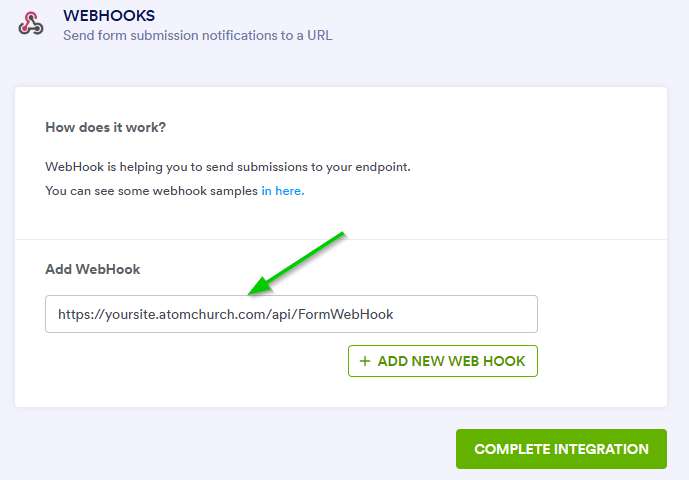
var POST_URL = "https://yoursite.excellerate.com/api/FormWebHook";
function onSubmit(e) {
    var form = FormApp.getActiveForm();
    var allResponses = form.getResponses();
    var latestResponse = allResponses[allResponses.length - 1];
    var response = latestResponse.getItemResponses();
    var payload = {};

    for (var i = 0; i < response.length; i++) {
        var question = response[i].getItem().getTitle();
        var answer = response[i].getResponse();
        payload[question] = answer;
    }
    var formData = {
      GoogleFormID : form.getTitle(),
      rawRequest : JSON.stringify(payload)
    }

    var options = {
        "method": "post",
        //"contentType": "application/json",
        "payload": formData
    };
   UrlFetchApp.fetch(POST_URL, options);
};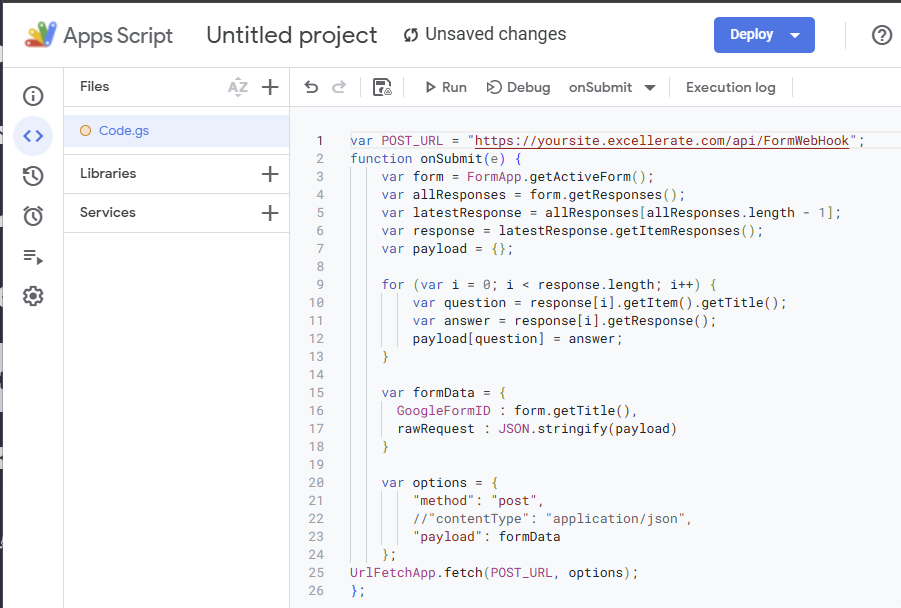
In the first line of code, make sure you replace “yoursite” with your own Atom site name which you can find in your Atom account under Utilities, Forms.
Click the save icon in the toolbar.
Now click on “Triggers” on the left, then ” + Add Trigger” button
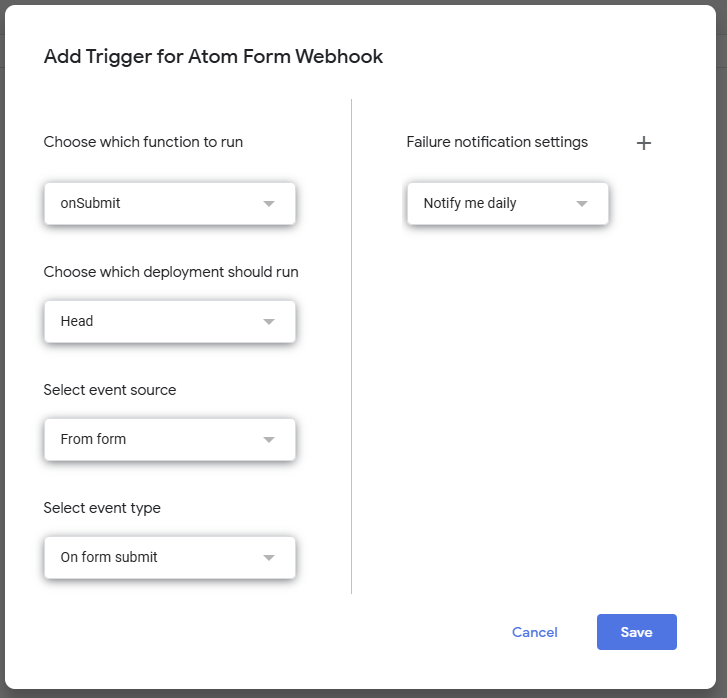
Change the “function to run” to onSubmit, and the “Select event type” to “On form submit”. Save.
Click the “Deploy” button, and choose “New deployment”
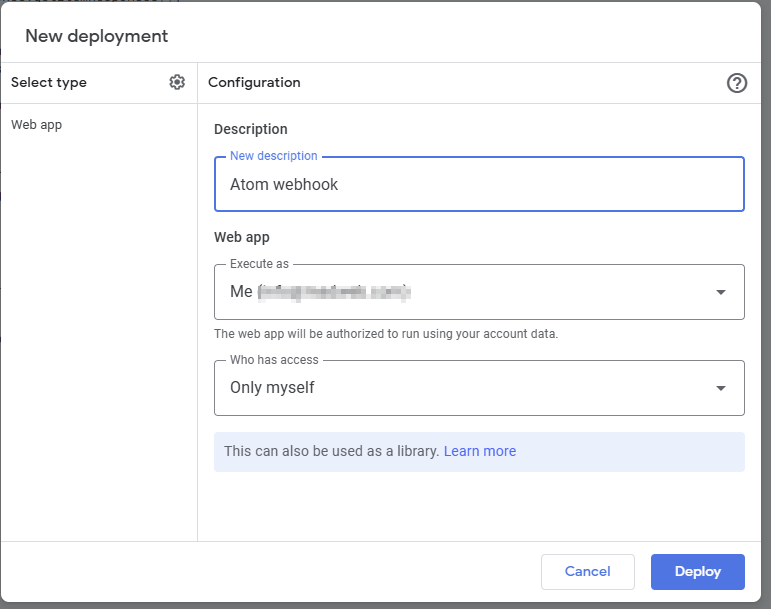
Choose “web app” and give it a description like “Atom webhook” and click “Deploy”
Step 2 – Set up the form mapping
Submit a sample entry from your Google form, which should send the submission to Atom.
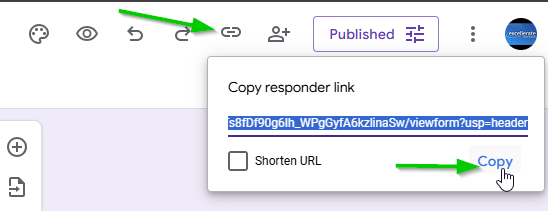
Note – You can get the link to the form by clicking “Copy responder link” icon, then copying the link and pasting into your browser:
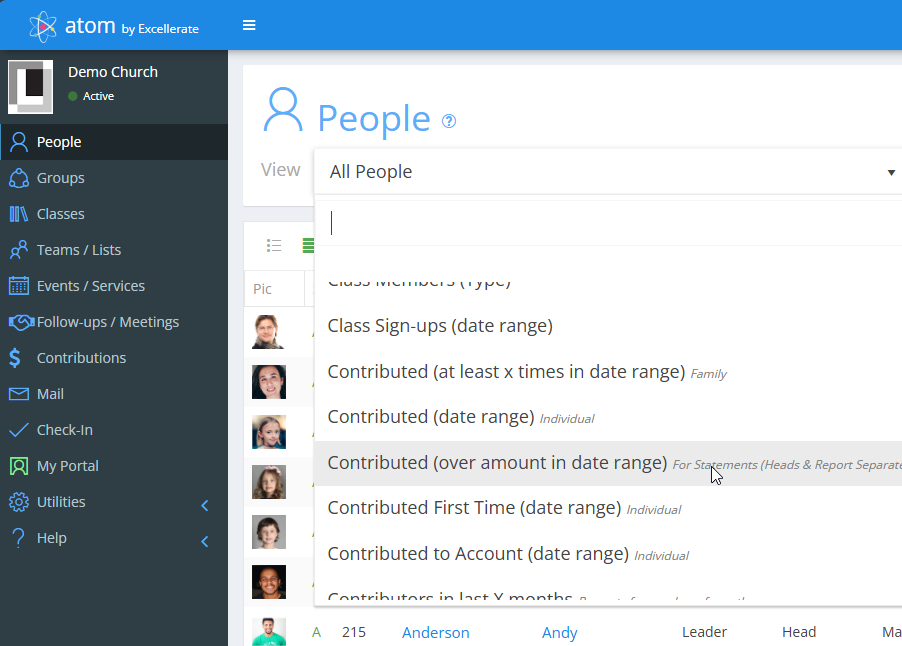
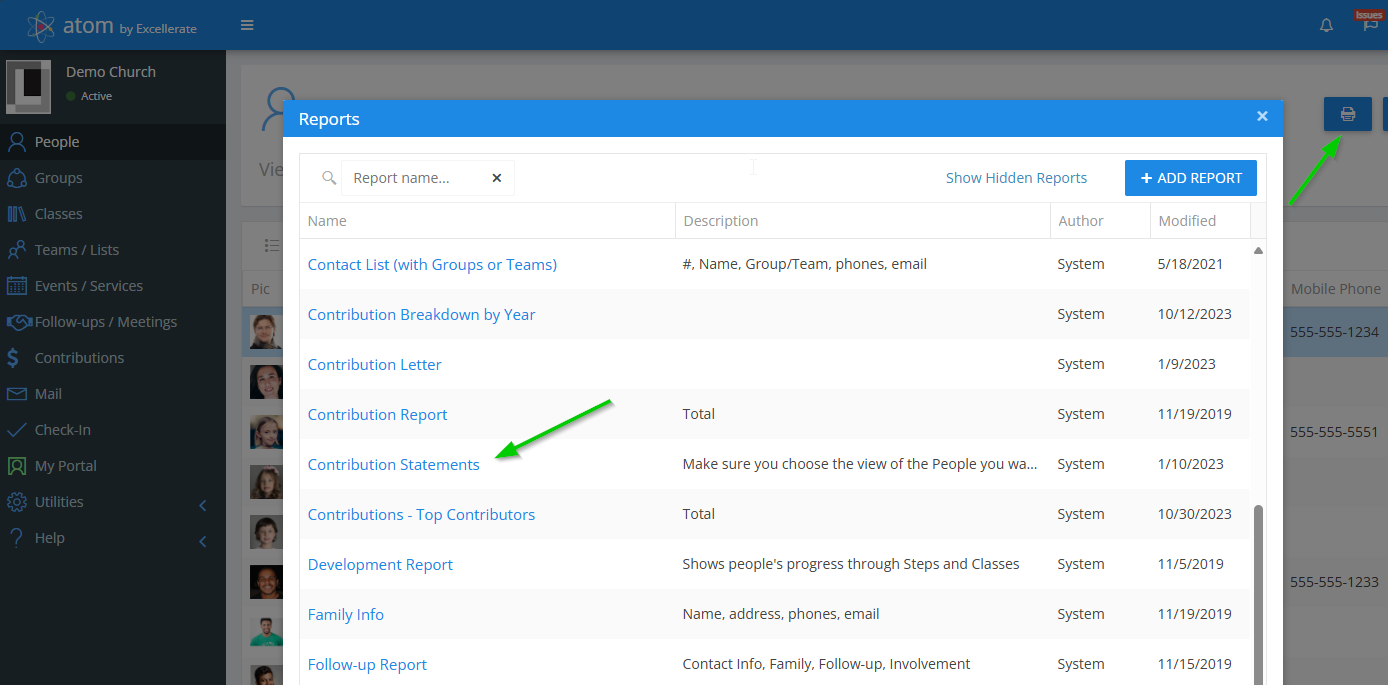
After you’ve submitted a sample submission, open Atom and go to Utilities, Forms, and click “External Form Mappings”
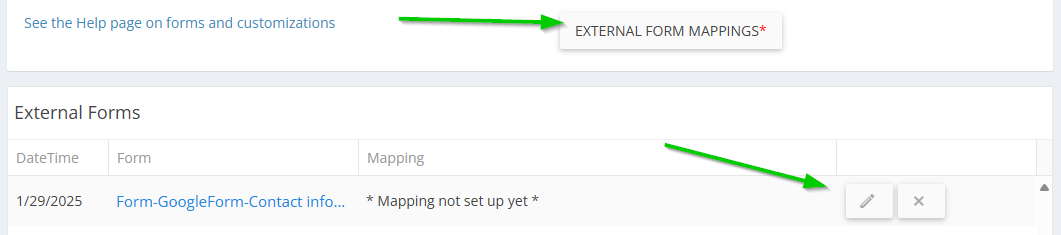
If you don’t see the form listed here, check to be sure your Atom webhook is set up correctly in Google.
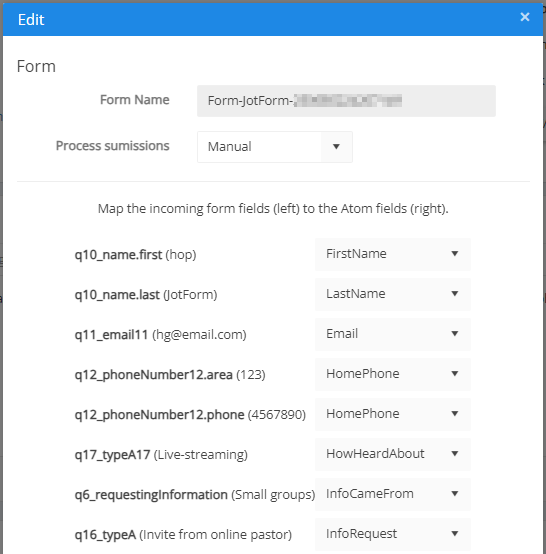
Click the edit button to set up the form mapping:
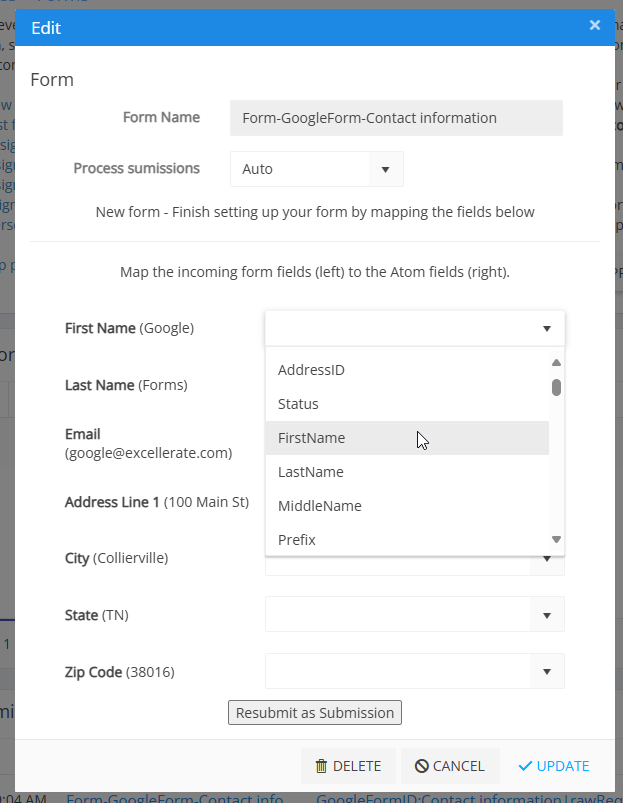
Here you are simply mapping the Google fields on the left to the corresponding Atom field on the right.
Also, specify how you want new submissions to be processed by specifying “Auto” or “Manual” – Auto means Atom will automatically process the submission and add the person to the database. Manual means you can review the submissions first, then click the “Process” button to manually process them.
Notes:
If the form is a request for more info, map the field to Atom’s “InfoRequest” field. (see the Automation example above on how to direct the info request to the right person)
If you want to add a Person Step from a form field, map a date field to the “AddStep=” field. For example, AddStep=Salvation
If you want to add a Tag from a form field, map a Yes/No field to the “AddTag=” field. For example, AddTag=Bulletin